BLOG
Mindful Munchkin Pumpkin Knitting Pattern
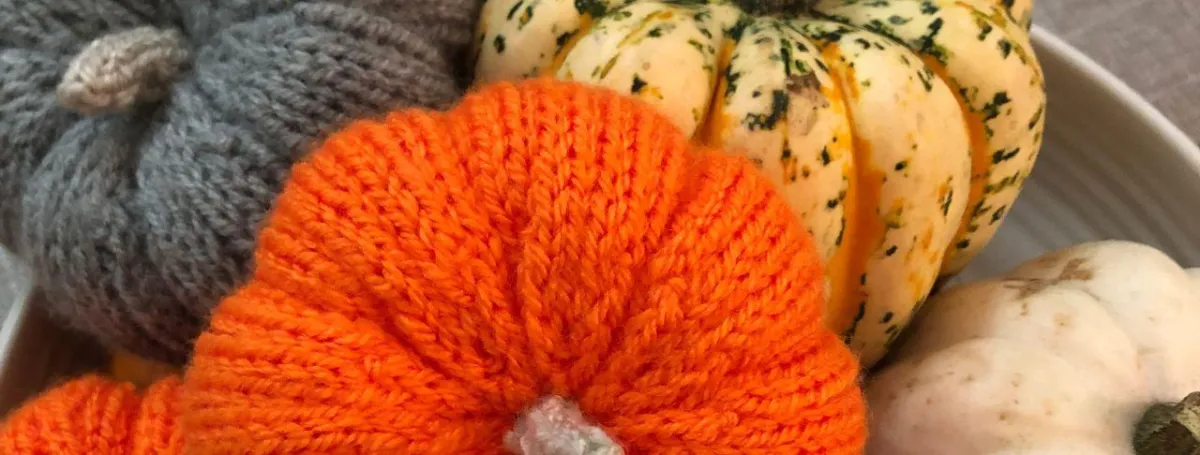
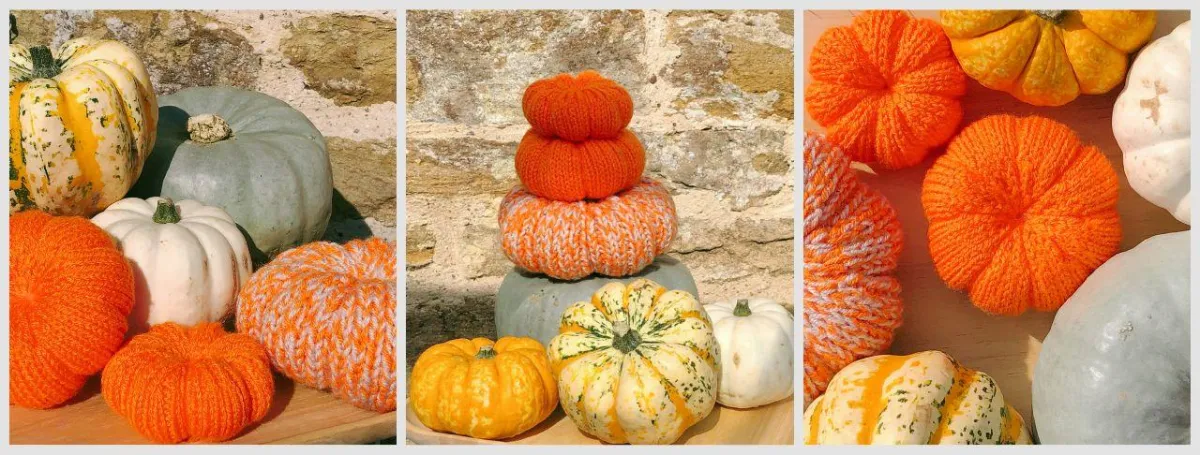
Pumpkins come in so many shapes, sizes, and colours – from soft creams and sage greens to deep golden yellows, rich russets, and bright orange. This free Mindful Munchkin Pumpkin knitting pattern celebrates that variety and brings a touch of autumn warmth to your home. You don’t need to feel limited to orange yarn – play with different textures and shades to create your own cosy pumpkin collection, perfect for mindful making.
The basic pattern is written for DK yarn and worked with 3mm needles.
When knitted as written, it creates a sweet munchkin-style pumpkin.
The final size of your pumpkin will vary depending on the gauge of your knitting and how much stuffing you use but as a guide most of the samples measured approx 10cm diameter and 4cm tall, excluding the stalk.
Once you settle into the rhythm of the main section (p1, k2), the knitting becomes steady and soothing - a gentle, meditative stitch pattern that’s perfect for mindful making.
Your finished pumpkin can be stuffed with toy stuffing or use up old yarn and fabric scraps.
Whether you knit one as a cosy autumn accent, or a handful to gather together in a bowl, these little pumpkins are a simple, joyful way to bring the season into your home.
What you'll need
Yarn:
Approx 30m - 35m, DK yarn
Optional small amount of contrasting yarn for the stalk.
Needles & Notions:
3mm circular needle with a long enough cable to knit using the magic loop method or 3mm double pointed needles (DPNs)
Darning needle
Stitch markers (optional)
Several handfuls of toy stuffing (or yarn/fabric scraps)
Use different yarn weights and/or needle sizes to achieve different sized pumpkins.
Abbreviations
st / sts - stitch / stitches
k - knit
p - purl
m1 - make 1. Using the left needle, pick up the strand between the last stitch you knit and the one you’re about to knit, bringing the needle from front to back. Then knit into the back loop of this stitch. (1 st increased)
yo - yarn over (increase 1 st)
cdd - centered double decrease. Slip the next 2 stitches together knitwise, knit the third stitch, pass the two slipped stitches over (decrease 2 sts)
rep / reps - repeat / repeats
Directions
Cast on 24 sts and join to work in the round
Increase Section
Round 1 - Knit all sts
Round 2 - *P1, k2, rep from to end of round
Round 3 - *P1, m1, k2, m1, rep from to end of round
Round 4 - *P1, k4, rep from to end of round
Round 5 - *P1, m1, k4, m1, rep from to end of round
Round 6 - *P1, k2, kfb, k3, rep from to end of round
Round 7 - *P1, k3, rep from to end of round
Round 8 - *P1, k3, m1, p1, m1, rep from to end of round
Round 9 - *P1, k1, kfb, k2, rep from to end of round
You will now have 96sts
Straight Section
Round 10 - *P1, k2, rep from to end of round
Rounds 11 - 25 - As round 10
Working to here will give you a munchkin pumpkin shape after stuffing. If you would like a more rounded pumpkin work an additional 15 rounds in the straight section.
Decrease Section
Round 26 - *P1, k1, cdd, k1, rep from to end of round
Round 27 - *P1, k3, rep from to end of round
Round 28 - *P1, cdd, rep from to end of round
Round 29 - *P1, k1, rep from to end of round
Round 30 - *P1, cdd, rep from to end of round
Leaving a long tail, break yarn and using a darning needle thread the yarn tail through the remaining stitches so that they are unable to unravel and leave the long tail attached so you can come back to use it to finish off after stuffing.
Stuffing & Finishing
Thread the tail from your cast on onto a darning needing and use a running stitch to stitch around the cast on edge ending with the needle and yarn on the wrong side of your work.
Draw the yarn tight to close up the hole.
Weave in the end to secure.
There's no need to cut off any excess yarn.
Stuffing
Stuff your pumpkin with toy stuffing until it feels very fat and it is difficult to keep the stuffing in. This will most likely take more stuffing than you expect
Closing the Bottom
Returning to the stitches held on the yarn tail, draw the yarn tight to close up the hole with the tail on the outside.
Work a few stitches to secure the yarn but do not cut the tail, the yarn tail will be used for the shaping.
Shaping
The pumpkin is shaped by threading the tail yarn up through the centre of the pumpkin and up and over the outside edge of the pumpkin following the 8 purl bump columns of the purl stitches that run from top to bottom, pulling tightly to create deep grooves round the edge of the pumpkin.
It's important to keep the tension tight to get the best shaping and can be a little fiddly but it's worth persevering.
Once all eight grooves have been created and with the yarn at the bottom of the pumpkin work a number of sewn stitches back and forth around the base of the pumpkin to ensure the yarn is super-secure.
If you've created deep grooves with lots of tension, you may wish to include a couple of knots in your stitches for extra security.
Once you've finished cut the yarn tail close to the eye of your darning needle and poke the needle up through your stuffed pumpkin and out the side leaving the yarn tail inside the pumpkin.
Adding a Stalk (Optional)
If you'd like to add a stalk, a short length of knitted icord works beautifully.
Using a contrasting yarn cast on 4 sts.
*Knit all stitches, without turning your work slide all stitches from the right needle, back to the left needle, rep from * until your stalk measure approx 3 cm.
Cast off all stitches.
Want to hang you pumpkin? Work a longer length of icord and fold before securing to the pumpkin to create a hanging loop.
Break the yarn and thread the end onto a darning needle. Pass the needle down through the center of the icord so that the yarn tail pops out next to the tail from the cast on.
Use the threaded needle to attach the stalk to your pumpkin and secure well.
Once the stalk is secured the two yarn tails can be trimmed to just a short length and then threaded/poked into the middle of the stuffing.
Your cute little pumpkin is complete!
🧶 Mindful Knitting Note
As you move into the straight section of this pumpkin, the steady rhythm of p1, k2 creates a natural flow.
Let yourself settle into it - notice your breath, the gentle movement of your hands, the quiet click of the needles.
This is your moment of pause.
A small pocket of stillness in your day.
Each stitch is a reminder that slowing down is not wasted time, it’s a way to nourish yourself as well as create something beautiful.
Based in Northamptonshire, inspiring knitters worldwide
© Nourish Nurture Knit 2026